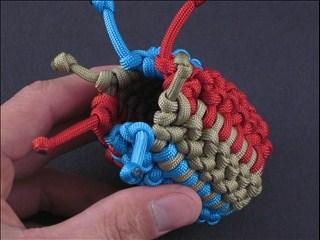
In this Paracord Elephant tutorial presented by Kris Everett, we discover how to make an elephant using 550 paracord. This woven elephant is perfect for a key chain decoration.
For this project you will need a 1” marble, a paracord needle or FID, needle nose pliers, one 10’ section of paracord, and one 6’ section of paracord. Melt the ends of your paracord to prevent them from fraying and make them easier to work with. To first thing to do is make a monkey’s fist with the 10’ section of paracord.
To make a monkey’s fist, start on the left about 2.5’ from the end with that point on your pinky, wrap the cord around first three fingers five times. Make a loop around your ring finger and back through from the other side between your ring and middle finger. This should create a perpendicular wrap around the first 5 wraps. Make a second perpendicular wrap in the same place keeping it flush with the first wrap, not overlapping.
Then carefully remove your middle finger and place the 1” marble in the center of the work. Make three more perpendicular wraps around the first set of wraps and the marble. Make sure they are flush with each other and not twisted or overlapping. Carefully remove your pointer finger and place the working end through the hole where your finger was from the top (which is the way the cord should be flowing). Then put the working end through the hole on the other side of the marble from bottom to top coming through the small loop that was created on your ring finger to start the second set of wraps.
Make a total of five wraps in the same fashion and then work the slack out of the monkey’s fist so that it is tight on the marble. This will take some time and patients. The remaining working ends should be even in length and should be about 1.5’. The remaining working ends will be used to make the nose of the elephant.
The point at which the working cord comes out of the work from the top, when both the cords are coming towards you will be the left eye. Directly across from the will be the right eye. The working cord just below the position of the right eye will need to be redirected so that it is symmetrical to the left side.
Attach the cord that needs to be redirected to the fid, and work the cord back through the hole it is coming out from and up through the hole of the right eye. Adjust the monkey’s fist so it is symmetrical. Bring the two working cords together at the center of the monkey’s fist to open up the eyes. The next thing to do is make the ears using the 6’ section of paracord.
To make the ears, take the 6’ section of paracord and fold it in half. At the half way mark, create a loop by twisting the cord over itself. Take the right working cord and create a small bite and put it through the loop, working from bottom to top. Do not pull the cord all the way through, this should create a new working loop.
Next take the right working cord and create another bite and stick it through the opening below the loop from front to back, under the cord in the center, and then back through the top of the working loop, coming towards you. Repeat this process four more times, weaving through each of the cords in the center of the working loop. You should always be starting at the bottom working in the center of the loop from front to back, and finishing at the very top of the loop working from back to front. There should be five loops at the bottom when you are finished.
Remove all the slack out of the cord. The remaining cord that is coming out of the top will make a tooth. The other remaining end will make up the other ear but needs to be attached to the monkey’s fist first. Attach the cord to the fid, and work it through the corner directly behind the left eye. You want the cord to flow in the same direction as the cord on the monkey’s fist. Pull the Pull the cord through the corner behind the right eye until the left ear comes into position.
Remove the fid, and create the right ear in the same way as the first. Work the slack out of the ea. This will also tighten both the ears down onto the head. Once you have finished the second ear, reattach the fid. Starting at the corner diagonal from where the second ear come out of, work the cord under the first wrap, and the under the first wrap of the set that is directly perpendicular to your position. Then work the cord through the hole just created working from the outside to the inside. Do this with the remaining working ends of both ears.
Tighten all the slack out of the cords so the ears are being held tightly in place. The working cords should be coming out under the point at which the working cords for the trunk are. These will create the tusks. The next step is making the trunk.
To create the trunk, make a loop on the left cord by twisting it over itself. With the remaining end flowing towards the right working cord, place the right working cord of the left working cord, and through the loop created on the left side, working from the bottom towards you. Place this not at the end of your trunk. The length of the trunk can be as long as you want, but a proportional trunk would be about as long as your pointer finger.
Make sure the knot is very tight. The trunk will be made up from snake knots from this point on. Put the left working cord together with the cords attached to the knot. Then take the right working cord over the three cords, around back to the starting side, and through the loop created working from top to bottom. Continue making snake knots until you reach the base of the trunk.
Once you reach the base of the trunk, attach the fid to one of the remaining ends and work it through the closest bottom wrap, which naturally flows with the work. Then work it through the wrap on the other side from below underneath of tusk. Repeat the same process with the other remaining cord. Both working cords should now be coming out of the center of the trunk base.
Weave some of the remaining cord through the center of two snake knots on the underside of the trunk. Then bring both remaining ends under the five wraps of the elephants face working from the bottom of the head under the trunk to the top of the head. Keep the working ends on their respective sides.
Work the both remaining cords through the top of their corresponding ears and then under the five weaves that flow naturally with the working cod. This will pull the ears down, creating a more realistic look. All that is left to do is cut the remaining paracord and either melt or super-glue the ends into place.





Leave a comment (all fields required)